POND 1981

Pond c.60" x 60" mosaic within a field of floor tiles.
Berkeley, CA
Berkeley, CA
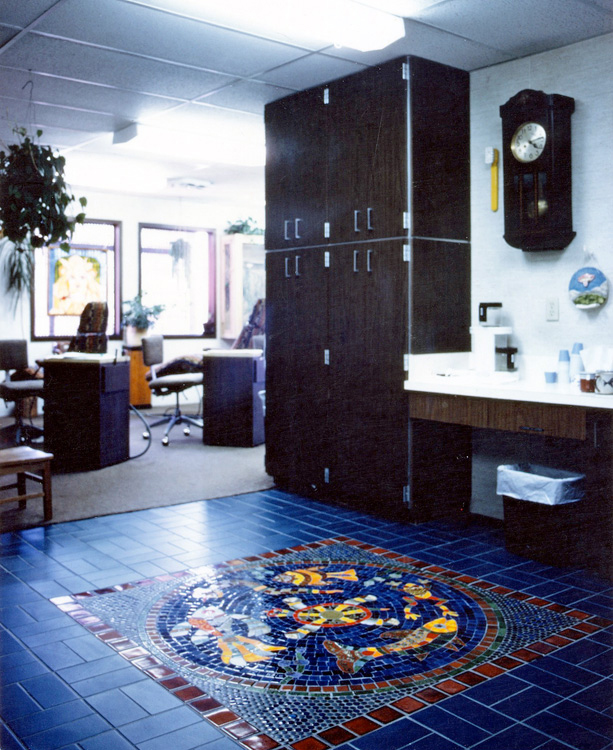


Our two kids had to have orthodontic work, a fairly expensive proposition for us but necessary for the kids, and we arranged a barter with our friendly and amenable orthodontist: a mosaic for the office in exchange for straightening two sets of teeth.
This was a visually lively office in Berkeley, with pictures on the walls, many small birds in large cages, plants, and friendly decor. It was an open floor plan, and the floor of the space between the waiting area and the area where the doctors did their work was to be redone in blue 4" x 8" ceramic tiles. I was to design and make a mosaic for this floor.
DESIGN
To go with the blue field tiles I designed a “pond” for the floor, the joke being that everyone had to “walk on water” to cross the space. The size of the mosaic was determined by the exact correspondence between a number of my border tiles and a number of the floor tiles. A row of 17 of my border tiles was equal to 7 lengths of the floor tiles, with both rows including spacing for grout lines, so the mosaic came to c. 5-foot square.
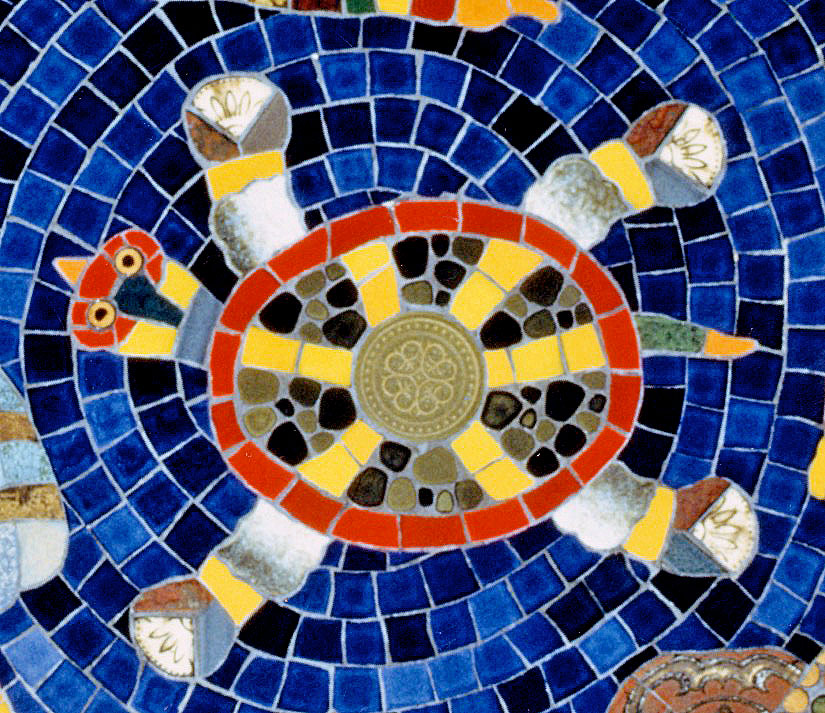
Because the Pond could be seen from all directions I centered the eyes of the fish on their heads so that they looked right side up from any view as they “swam” around. As in my smaller mosaics, I used the circle in the square design.
FABRICATION
I followed the same procedure with the Pond as I had with my other flat mosaics, cutting and placing ceramic tiles on my drawing and taping the finished piece with clear tape. But unlike with the pieces I set on supporting boards, this piece was to be set on the site in sections like the Clock, this time on the floor instead of on a wall. But like my first piece for our bathtub wall, and unlike the Clock, this piece had to be flush on its face and even with the floor tiles surrounding it.
All of the mosaic tiles were thinner than the heavy floor tiles, which were about 3/8th of an inch thick. To solve this problem I marked and cut the mosaic into sections (again like the Clock) and flipped them, still taped, onto their face sides. Then one by one I buttered the backs of each section with thin set mortar to the exact thickness of the blue floor tiles. Each section of the mosaic could now be handled as if it was a single tile, and the mosaic could be set to be flush with the surface of the surrounding floor tiles.
INSTALLATION
I made a paper square the exact size of the mosaic and used it to mark out the mosaic’s exact position on the plywood subfloor. I had hired tile-setters to set the floor tiles, and after they were done I set the prepared sections of my mosaic in thin set mortar into the open square on the plywood. My last tasks were to remove the clear tape from the mosaic, grout the spaces between the mosaic sections and between the edge of the mosaic and the floor tiles, and clean the whole surface.
This was a visually lively office in Berkeley, with pictures on the walls, many small birds in large cages, plants, and friendly decor. It was an open floor plan, and the floor of the space between the waiting area and the area where the doctors did their work was to be redone in blue 4" x 8" ceramic tiles. I was to design and make a mosaic for this floor.
DESIGN
To go with the blue field tiles I designed a “pond” for the floor, the joke being that everyone had to “walk on water” to cross the space. The size of the mosaic was determined by the exact correspondence between a number of my border tiles and a number of the floor tiles. A row of 17 of my border tiles was equal to 7 lengths of the floor tiles, with both rows including spacing for grout lines, so the mosaic came to c. 5-foot square.
Because the Pond could be seen from all directions I centered the eyes of the fish on their heads so that they looked right side up from any view as they “swam” around. As in my smaller mosaics, I used the circle in the square design.
FABRICATION
I followed the same procedure with the Pond as I had with my other flat mosaics, cutting and placing ceramic tiles on my drawing and taping the finished piece with clear tape. But unlike with the pieces I set on supporting boards, this piece was to be set on the site in sections like the Clock, this time on the floor instead of on a wall. But like my first piece for our bathtub wall, and unlike the Clock, this piece had to be flush on its face and even with the floor tiles surrounding it.
All of the mosaic tiles were thinner than the heavy floor tiles, which were about 3/8th of an inch thick. To solve this problem I marked and cut the mosaic into sections (again like the Clock) and flipped them, still taped, onto their face sides. Then one by one I buttered the backs of each section with thin set mortar to the exact thickness of the blue floor tiles. Each section of the mosaic could now be handled as if it was a single tile, and the mosaic could be set to be flush with the surface of the surrounding floor tiles.
INSTALLATION
I made a paper square the exact size of the mosaic and used it to mark out the mosaic’s exact position on the plywood subfloor. I had hired tile-setters to set the floor tiles, and after they were done I set the prepared sections of my mosaic in thin set mortar into the open square on the plywood. My last tasks were to remove the clear tape from the mosaic, grout the spaces between the mosaic sections and between the edge of the mosaic and the floor tiles, and clean the whole surface.